Publishing to Apple App Store
The publishing process is the same as any other native iOS app, with some additional considerations to take into account.
If you are using Expo then read the Expo Guide for Building Standalone Apps.
1. Enable App Transport Security
App Transport Security is a security feature introduced in iOS 9 that rejects all HTTP requests that are not sent over HTTPS. This can result in HTTP traffic being blocked, including the developer React Native server. ATS is disabled for localhost by default in React Native projects in order to make development easier.
You should re-enable ATS prior to building your app for production by removing the localhost entry from the NSExceptionDomains dictionary and setting NSAllowsArbitraryLoads to false in your Info.plist file in the ios/ folder. You can also re-enable ATS from within Xcode by opening your target properties under the Info pane and editing the App Transport Security Settings entry.
If your application needs to access HTTP resources on production, learn how to configure ATS on your project.
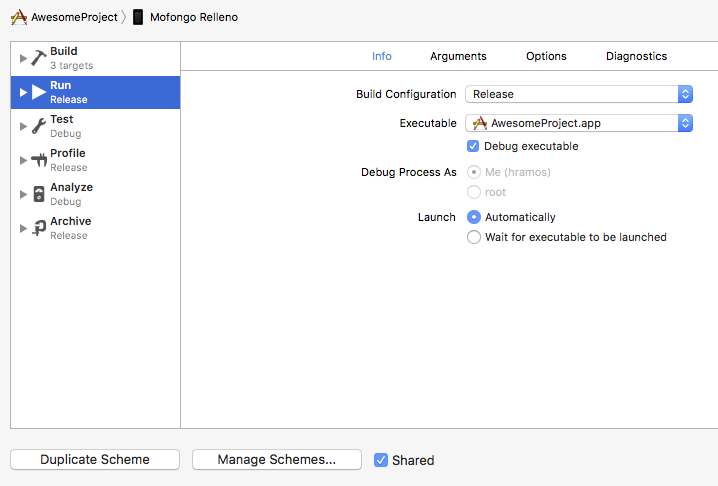
2. Configure release scheme
Building an app for distribution in the App Store requires using the Release scheme in Xcode. Apps built for Release will automatically disable the in-app Developer menu, which will prevent your users from inadvertently accessing the menu in production. It will also bundle the JavaScript locally, so you can put the app on a device and test whilst not connected to the computer.
To configure your app to be built using the Release scheme, go to Product → Scheme → Edit Scheme. Select the Run tab in the sidebar, then set the Build Configuration dropdown to Release.
Pro Tips
As your App Bundle grows in size, you may start to see a blank screen flash between your splash screen and the display of your root application view. If this is the case, you can add the following code to AppDelegate.m in order to keep your splash screen displayed during the transition.
  // Place this code after "[self.window makeKeyAndVisible]" and before "return YES;"
  UIStoryboard *sb = [UIStoryboard storyboardWithName:@"LaunchScreen" bundle:nil];
  UIViewController *vc = [sb instantiateInitialViewController];
  rootView.loadingView = vc.view;
The static bundle is built every time you target a physical device, even in Debug. If you want to save time, turn off bundle generation in Debug by adding the following to your shell script in the Xcode Build Phase Bundle React Native code and images:
 if [ "${CONFIGURATION}" == "Debug" ]; then
  export SKIP_BUNDLING=true
 fi
3. Build app for release
You can now build your app for release by tapping ⌘B or selecting Product → Build from the menu bar. Once built for release, you'll be able to distribute the app to beta testers and submit the app to the App Store.
You can also use the
React Native CLIto perform this operation using the option--configurationwith the valueRelease(e.g.npx react-native run-ios --configuration Release).